1.Getting Started
There are five plans that have been crafted to fit various customer needs.
The needs range from number of social channels, organisations, users and
products a user
can be able to add to their account. It also includes access to various
engagement tools,
analytics and reports. Based on your needs you can select any of the available
plans that
best suit you. Below is a summary of the plans. You can view the detailed plan
description
in the pricing page.
-
Free Plan
-
For small businesses and individuals getting started on social media
automation.
-
Basic plan
-
For businesses that want to automate & streamline their content planning
& publishing.
-
Professional plan
-
For businesses that want to plan, publish and engage with their audience
at scale.
-
Standard plan
-
For big organizations and teams that want collaboration, engagement and
advanced analytics tools.
-
Agency
-
For marketing agencies managing multiple businesses and want advanced
social media tools.
If your needs aren’t covered in the listed plans, you can reach to us directly
through our email, support@powpap.com to request for a custom
plan.
Once you select a plan and sign up to powpap, you’ll be required to set up your
organization/business. Powpap provides you with workspaces that you can use to
organize and categorize your various workflows. These workspaces are based on
organisations and every user is required to set up atleast one. When setting up
your organization, you’ll be prompted to key in the name, location, industry and
sub-industry.
To add more organisations, you can click on the plus(+) icon found on the
left-most menu.
Once you have added your organization, you’ll be redirected to a page where you
can add the social channels that you want to manage.
You can also connect a social channel later through the socials tab. This
tab can be found under the settings menu.
Social networks currently available for configuration in powpap are:
-
Facebook
-
You can add your facebook page by clicking on the provided link. Powpap
will check if there are any logged in facebook accounts in your browser
and then prompt you to select the facebook page you want added. You’ll
also be prompted to select an ad account associated with that page. If
there are no logged in facebook accounts, you’ll be redirected to a page
where you can log in to the facebook account and then add the page.
-
X
-
You can add an X account by clicking on the X link provided. Powpap will
check if there are any logged in X accounts in your browser. If you are
logged in to an account you’ll be redirected to a page where you will be
prompted to allow and confirm permissions. Your account will then be
added. If there are no logged in X accounts, you’ll be redirected to a
page where you can log in to the account and then add it.
NOTE: X is not available for free plan users. This is due to
the recent changes in X API
policy, and increase in API costs.
-
Instagram business
-
You can add an Instagram business account by clicking on the provided
link. You’ll first need to select the facebook account linked to your
Instagram account in order to proceed. Instagram business accounts are
accounts that are meant for brands and businesses. They offer you more
analytical tools. To know how to change your regular account to a
business account you can follow the steps in this link setting up an
instagram business account
-
linkedIn
-
You can add a linkedIn account by clicking on the linkedIn link
provided. Powpap will check if there are any logged in linkedIn accounts
in your browser. If you are logged in to an account you’ll be redirected
to a page where you will be prompted to allow and confirm permissions.
Your account will then be added. If there are no logged in linkedIn
accounts, you’ll be redirected to a page where you can log in to the
account and then add it.
More social network configurations like tiktok, pinterest, youtube etc are
coming your way soon.
If you plan on running paid campaigns, you’ll be required to add your
organization’s product(s) or cause(s) since they are needed for tracking the
campaigns. You can add a product by clicking on the products tab in the main
menu, and then clicking on the plus(+) icon provided in the page.
You can then enter the details of your product/cause including the name, sector
and price(if applicable).
2.Creating and scheduling posts.
Click on the ‘create post’ button on the top menu.
If you wish to post to multiple social channels simultaneously, click on the
first button in the
left menu. This will automatically select all the socials that have been
connected to your powpap
account in that specific organization workspace.
You can then unselect the social channels that you don’t want to post to by
clicking on the individual
social channels below the text input box. The blue ring surrounding the social
will then disappear.
To select socials linked to a specific social media platform only, click on any
of the social media you
wish to post to on the left menu. Example, if you want to post to facebook pages
only, click on the
facebook icon, all the facebook pages connected to that specific organization
will then appear at the
bottom below the caption input box. You can unselect the ones you don’t want to
post to by toggling(clicking) them.
In the window that appears add your photo or footage by dragging and dropping
them anywhere in the dashed box.
You can also add your photo/video by clicking on the ‘select file’ link inside
the dashed box. This will
redirect you to your local drive where you can select the image/footage that you
want.
Next you can add your caption by typing in the text input box or pasting your
text in the box.
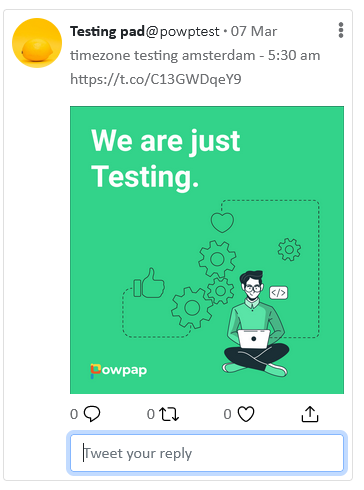
You can preview how your posts will look like in the different social channels
on the right column. You can
toggle between the different previews by clicking on the tab you wish at the top
of the preview window.
After you are done creating your post, you can either schedule or post
immediately by clicking on the ‘post now’ button.
If you wish to schedule, click on the schedule toggle.
An input box will appear, click on calendar icon in the input box and select the
date you want to schedule. To choose the time you want to schedule, click on the
clock icon at the bottom of the calendar and enter the time. After you are done,
click on the ‘done’ button at the bottom.
Click on the schedule button at the bottom and your posts will be
automatically scheduled.
3.Creating and publishing a content plan.
A content plan is a consolidation of all the images, footage, and captions that are
required for publishing on social media. It also includes mapping the posts into a
calendar.
To view your content plans navigate to the ‘social community’ menu, and then
click on the
‘content plans’ submenu. You will be able to see all your created content plans
including
drafts and published plans.
To create a new content plan click on the ‘create content plan’ shortcut button
at the top-left of the screen.
You can also create a new content plan by navigating to the ‘content plans’
page, found under the ‘social community’ menu, and then clicking on the ‘new
content plan’ button at the top-right corner of the screen.
A new plan will be created.
You can change the title of the plan by clicking on the icon next to the default
title and then typing in your new title. After you’re done press ‘Enter’ on the
keyboard.
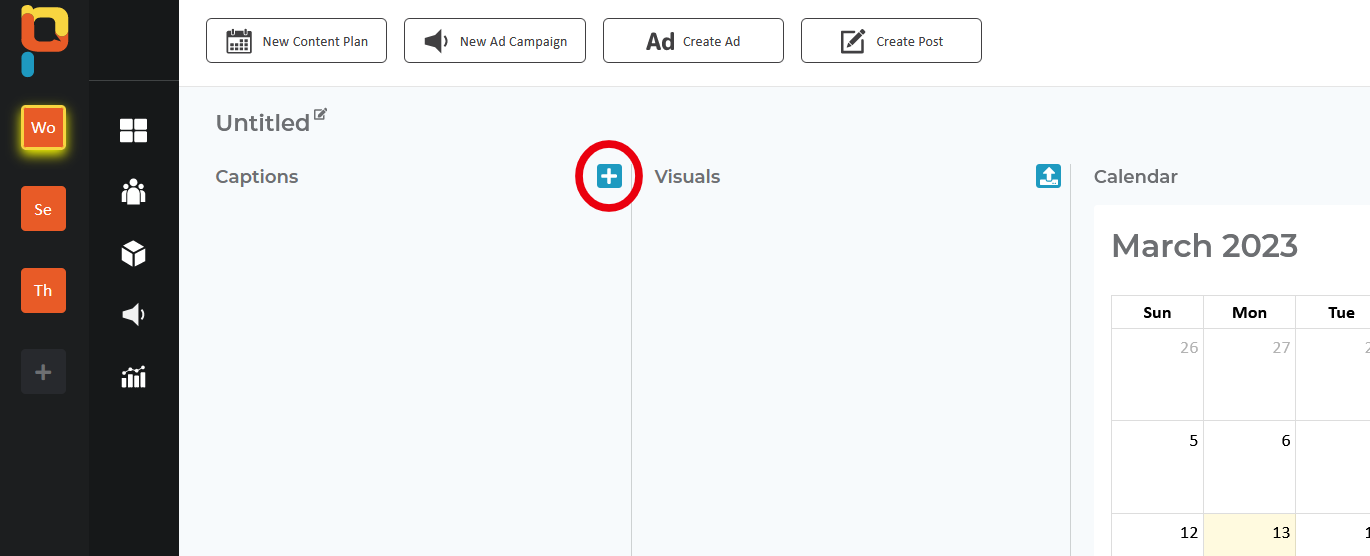
To add captions to your content plan, click on the blue plus(+) icon on the
top-right side of the captions tab.
A popup will appear where you can type or paste your caption/message, and then
click on the ‘add’ button to save the changes.
Once the caption is created, you can edit, delete or create a visual by clicking
on the three dots at the corner and selecting the action you want done.
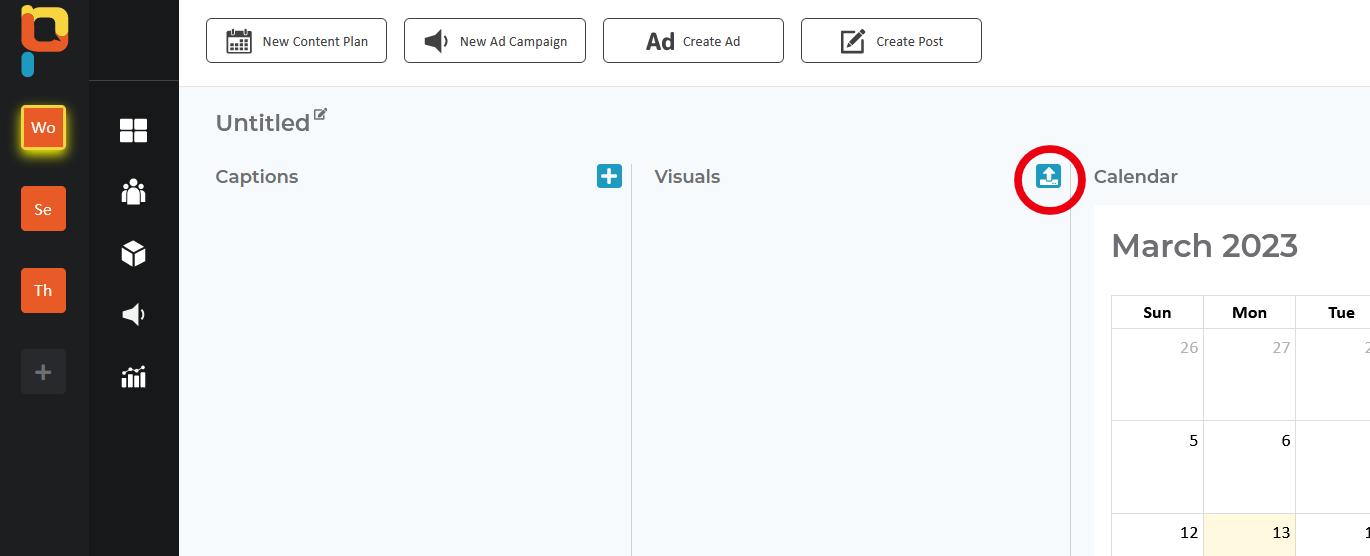
To import images or videos to your content plan, click on the ‘upload’ icon on
the top-right side of the visuals tab.
An explorer window will appear where you can select the image or video that you
want imported into your content plan.
You can also import multiple images by selecting images while holding the ‘cmnd’
or ‘ctrl’ button on the keyboard.
Once the visual is created, you can duplicate or delete it by clicking on the
kebab(three-dots) at the corner and selecting the action you want done.
You can also drag and drop your visual to a specific date on the calendar.
This will automatically schedule your post to be published on that date.
To create captions for your visuals, just drag and drop your captions onto the
preferred visual.
This will automatically merge the caption to the visual thus creating your post.
You can duplicate or remove the caption by clicking on the kebab(three-dots) at
the corner and selecting the action you want done.
To schedule your posts, just drag and drop your posts/visuals to a specific date
on the calendar. This will automatically schedule your post to that date.
Posts will automatically be scheduled using the bulk time. You can set the
bulk time at the input box found below the calendar.
If you don’t want to use the bulk time for specific posts, you can click the
post, and uncheck the bulk-time input, a time input will appear where you can
set your preferred time.
By clicking on the post in the calendar, you can also preview or delete the
post.
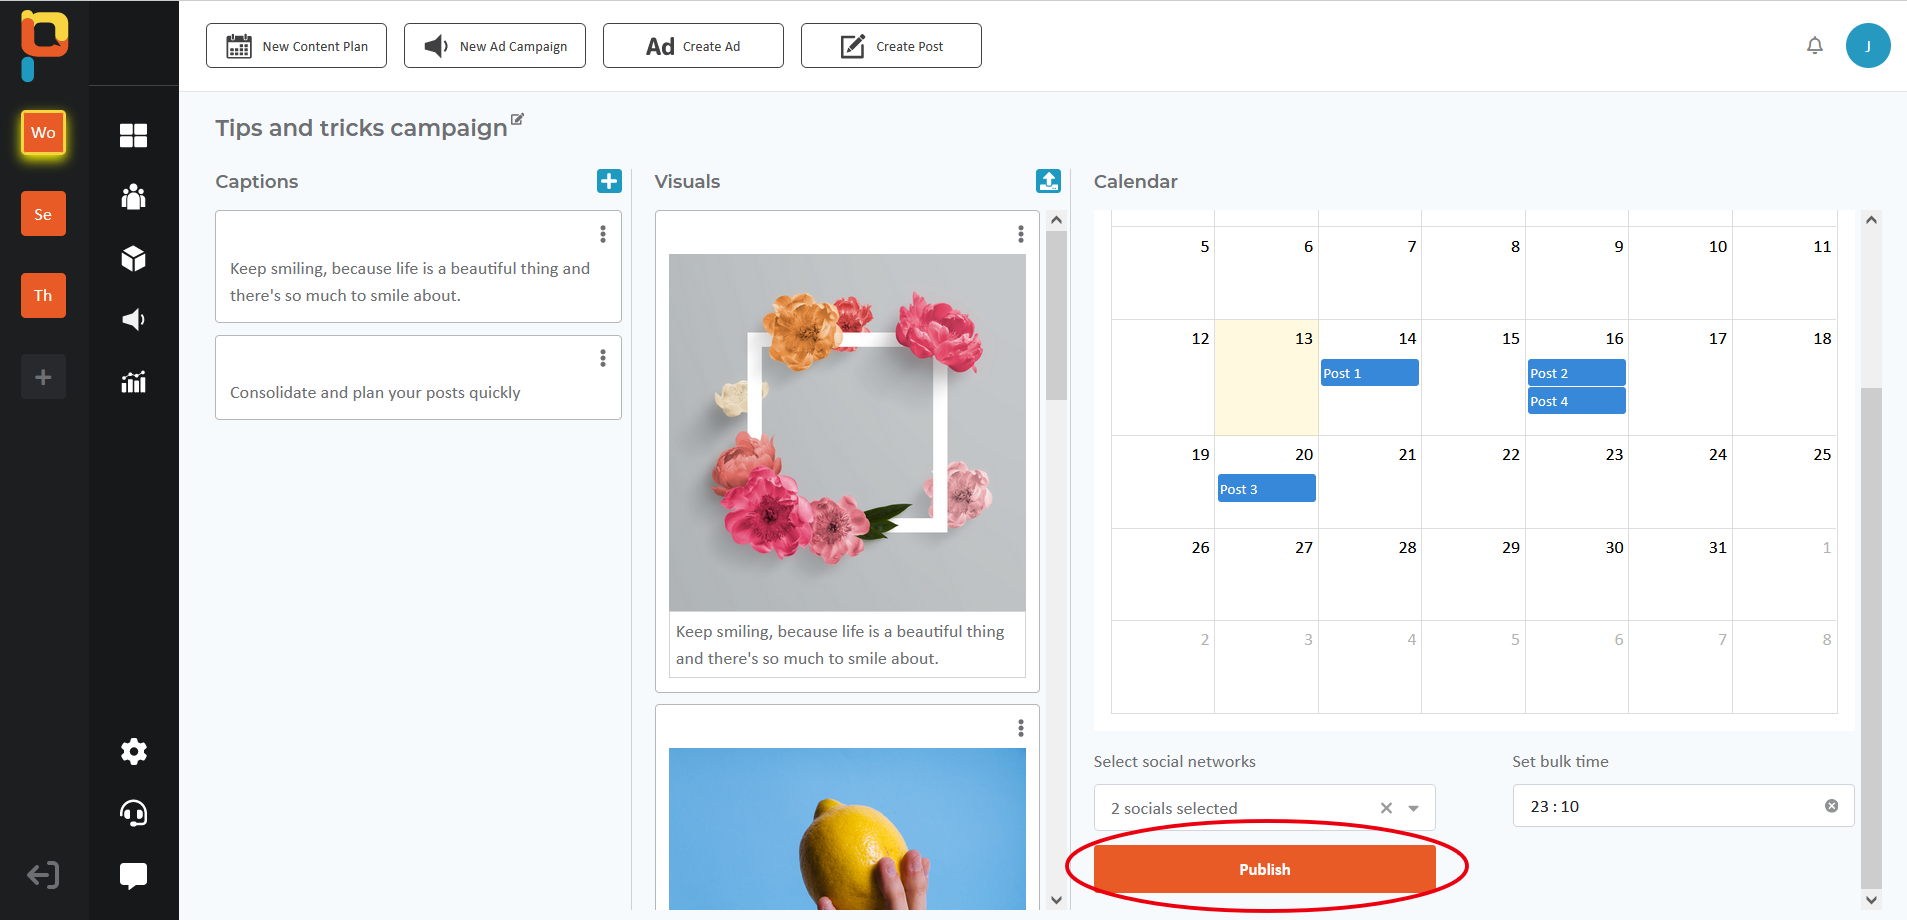
To publish your posts, you first have to select the social channels that you
want to publish to. You can do this by clicking on the social media drop-down
selection found below the calendar. Select the socials that you want to publish
to and then click on publish.
This will automatically schedule and publish all the posts in your calendar
once the scheduled dates and times reach.
For the free plan, content plan drafts are limited to 5 and will be deleted 45
days after time of last edit while completed published content plans will be
deleted after 30 days.
4.Tracking scheduled posts.
To view your scheduled, drafts, published and failed posts, go to the calendar that is
found in the social community submenu. Click on it and a calendar will appear with your
various posts.
The calendar has been structured into two views, one view to see posts that have
been created
using the planner and the other to see posts that have been created using the
normal ‘post
creation’ method. You can navigate between the two views through the tabs at the
top labelled
‘planner posts’ and ‘non-planner posts’. Click on the view you want and the
corresponding
calendar will appear. drafts and published plans.
Scheduled posts will appear as blue, successfully published posts as green,
drafts as grey, failed posts as red and partially published posts as yellow.
Partially published posts are posts that were set to be published on a
number of social channels but failed to publish on some of the socials.
You can click on the various cards to view the details of your post.
5.Monitoring your feeds.
To view the social media feeds for all the socials you have added, go to the feeds
section found in the social community submenu.
Click on the feeds submenu and a tab will be displayed showing your feeds side by side
for the social channels that have been added.
You can navigate to the comment-view or message-view tab to have a detailed
perspective of the comments or direct messages for the supported social networks.
6.Managing your engagements.
To interact with your posts’ comments, navigate to the comment-view tab found in the
feeds section under the social community menu.
Select the social that you wish to manage the comments in the drop-down box.
Once the posts for the selected social appear, click on the post you wish to view its
comments.
If the specific social network is supported, a stream of the comments under that post
will appear on the right column.
To reply to a comment click on the comment to select it.
A text box will appear at the bottom of the column where you can type in your
reply and post.
Some social networks are not supported due to API limitations, but our engineers
are working around the clock to find a solution.
To comment on your posts, navigate to the multiple-view tab and click on the
comment icon under
the post you wish to comment on. Type in your comment and press enter, or click
on the post button if it’s visible.
To react, like or share your posts, navigate to the multiple-view tab and click
on the react, like or share button found under every post. Depending on whether
the function is supported in powpap, your action should be completed and also
reflect on the actual post.
7.Accessing and responding to your social media ‘direct messages’.
To view your direct messages from the linked social channels, navigate to the
message-view tab found in the feeds section under the social community menu.
Select the social that you wish to manage its messages in the drop-down box.
Once your inbox for the selected social appears, click on a conversation you wish to
engage in. The chats for that conversation will appear on the right column. You can
reply to the chat through the message box at the bottom of the chat window.
Some social networks may not be supported in this functionality due to API limitations.
8.Upgrading, downgrading or cancelling subscriptions.
To upgrade or downgrade your subscription, navigate to the settings menu. Click on the
‘subscriptions’ sub-menu. A page displaying the details of your current and previous
subscriptions will be shown. Click on upgrade/downgrade button at the top of the page.
You will be redirected to the plans page where you can select the new plan you wish to
move to.
Once you upgrade or downgrade your plan will be updated immediately, and then get
notified of the new agreement. The new price associated with the new plan is payable at
the beginning of the next billing cycle.
Downgrading your Plan may cause the loss of content, features, or capacity of your
account.
Once a person upgrades or downgrades their plan, and 24 hours has elapsed, one won't be
able to change their plan till the next billing cycle.
To check the payment terms, see our terms of service.
9.Completing payments.
To complete a payment, navigate to the settings menu. Click on the ‘billing’ sub-menu.
You can add your billing information
here and complete payment by clicking on the payment button. You’ll be redirected to a
secure payment page hosted by our
third-party payment service provider called Paystack — a Stripe-backed company that
boasts PCI DSS Level 1 Certification.
10.Adding team members.
To add a team member navigate to the settings menu. Click on the teams sub-menu. A tab
will be displayed where you will be able to see a button labelled ‘Invite team member’.
Click on the button and type in the email address of the person you plan to add to your
team.
Once done, an email invite will be sent and the person will be able to accept the
invitation by following the link provided in the email.


